


Author: SLK Medical Clinical Team
Reviewed by: SLK Medical Clinical Team (medical content review)
Who this is for: clinicians, wound care staff, and distributor trainers
Scope: general education on sizing and securement; follow local protocols and clinician judgment for diagnosis, infection concerns, and product selection
Sizing a 4×4 silicone foam dressing sounds simple until you’re dealing with an incision that sits on a moving joint, a shallow ulcer with an irregular perimeter, or fragile periwound skin that won’t tolerate aggressive tape.
This guide is a practical, non-graphic fit method you can use to decide when 4×4 is enough, when to move to 3×3 or 6×6, and how to secure non-bordered foam without creating new skin problems.
Clinical note: This is general educational information. Follow local protocols and clinician judgment for wound assessment, infection concerns, and dressing selection.
What “good fit” means for 4×4 silicone foam
A good fit isn’t just “the pad covers the wound.” It means the dressing:
sits on clean, dry, intact periwound skin
has enough overlap to reduce edge lift and leakage risk
stays in place through movement and routine care
has a clear fixation plan if you’re using non-bordered foam
Quick overlap rule (default)
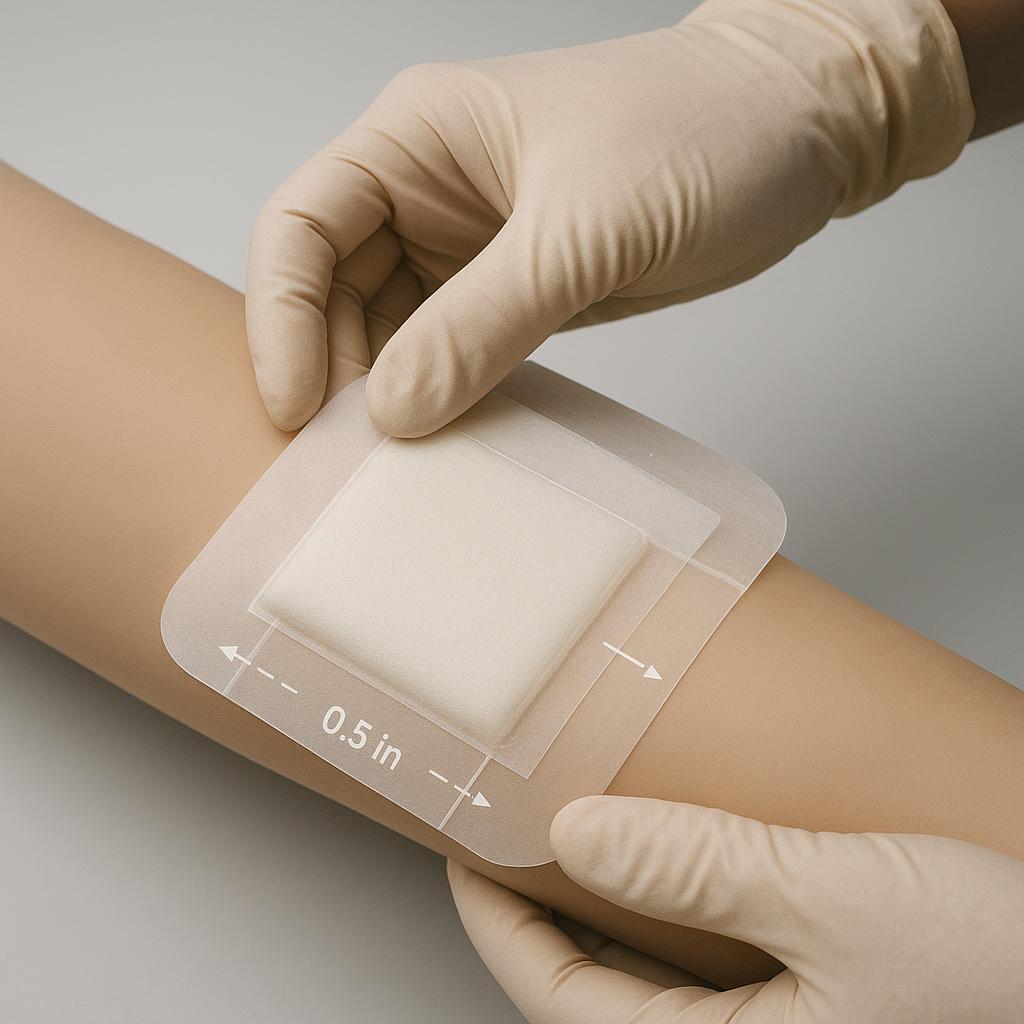
Start with a minimum ~0.8 inch (≥2 cm) overlap beyond the site perimeter. This aligns with commonly cited guidance to select a dressing that extends onto intact skin beyond the wound edge (see Wounds International — Role of dressings in pressure ulcer prevention).
If a larger footprint creates wrinkles on a very small, low-exudate site, use the smallest size that still seals flat on intact skin—and if you keep reaching for “more tape,” treat it as a sizing/shape issue first.
Step-by-step: measure the site and plan your overlap margin
Prerequisites
Ruler or measuring tape
Gloves and standard wound-cleansing supplies
The dressing type you intend to use (bordered or non-bordered)
A secondary fixation option if using non-bordered foam (tape, gauze, or a retention wrap)
Step 1: Measure the “working perimeter” (not just the open area)
Measure the longest length and width that must be covered (include any area where drainage/strike-through is likely).
Note whether the perimeter is smooth (oval/round) or irregular (angles, undermining risk, folds).
Done when: you can draw a simple rectangle around the area that must be covered.
Step 2: Add your overlap margin
Add ≥2 cm overlap on all sides as the default.
If you’re using a bordered dressing, confirm the border can contact skin fully without folding.
SLK Medical’s own educational guidance commonly describes sizing foam dressings so they extend beyond the wound edges (their step-by-step foam dressing guide notes a larger overlap range for full coverage in general use) in SLK Medical’s step-by-step foam dressing guide.
Done when: you can state your target “pad coverage size” and whether a 4×4 footprint can deliver it.
Step 3: Verify the fit on skin before committing
Place the dressing (still on its liner) over the site.
Confirm you can achieve:
the overlap you planned
a flat perimeter with minimal wrinkling
a placement that won’t be sheared off by movement
Done when: you can point to the exact dressing size you’ll open—and you can explain why.
Site-fit table: when 4×4 is enough vs when to size up
Use this table as a quick field guide. It’s written for mixed stakeholders: it gives clinicians clear fit rules and gives distributors a teachable framework to reduce “wrong size” returns.
Key:
4×4 works = 4×4 is a reasonable default starting size
Size up = go larger (often 6×6 or a longer rectangle)
Consider 3×3 = small sites where excess dressing causes lift or waste
Use scenario | 4×4 works when… | Size up when… | Consider 3×3 when… |
|---|---|---|---|
Straight surgical incision (low movement area) | You can maintain ≥2 cm overlap along the full perimeter and the dressing lies flat | Edges are lifting, incision sits near a fold/waistband, or drainage reaches the edge early | Incision is short/narrow and 4×4 creates edge wrinkle or poor seal |
Post-op site near a joint (knee, elbow, shoulder) | You can place the dressing so movement doesn’t tug the border/fixation | Any repeated edge lift, frequent re-pressing, or high shear from motion | Rare—joint areas usually punish small margins |
Shallow ulcer with regular perimeter | ≥2 cm overlap stays on intact skin; no edge leak | Perimeter is irregular, maceration risk is rising, or exudate volume is moderate/heavy | Very small ulcers where a larger dressing won’t conform |
Ulcer near contours (malleolus, heel edge, sacral curve) | You can achieve a flat seal without folds | Any fold/wrinkle at the edge, dressing “bridges” over a contour, or lifting starts within hours | Only if the site is genuinely small and a smaller dressing improves conformity |
Fragile periwound skin / tape-sensitive patient | Bordered foam sits without aggressive tape; removal is atraumatic | Non-bordered requires too much tape or fixation causes skin trauma | When smaller footprint reduces adhesive contact area |
Distributor “standard kit” recommendation | 4×4 covers many common scenarios with a simple training message | Complaints center on lift/leak in high-mobility or high-exudate cases | If waste/cost objections are common for smaller sites |
Beyond 3×3 / 4×4 / 6×6: when rectangles beat squares
If the site is long (many incisions), a rectangle often seals better than “oversizing” a square.
Increase one dimension for long, narrow sites.
Increase both dimensions for movement, curvature, or higher exudate.
For a quick overview of shapes, see foam dressing sizes and shapes.
When-to-size-up rules for 4×4 silicone foam dressing sizing
If any of these are true, treat 4×4 as a starting point and move up to a larger footprint:
You can’t maintain your overlap without compromising seal.
The site sits on a contour and the edge wrinkles.
Edge lift happens repeatedly even after smoothing.
Exudate challenges the edges (strike-through, seepage, or maceration risk).
High-mobility placement (joints, waistline, high shear zones).
You’re using non-bordered foam and would need excessive tape to keep it in place.
A manufacturer-style example of non-bordered silicone foam guidance commonly recommends selecting a dressing size with a larger margin beyond the wound and then using secondary fixation; see the “overlap the wound margin” sizing language in MedWay’s MedVance non-bordered silicone foam dressing page.
Keyword note (for search and indexing)
This section addresses secondary fixation for non-bordered foam dressing and the related foam dressing size up rules used in practice.
Evidence notes (why these rules are used)
Recommendation in this guide | Why it matters | Example source |
|---|---|---|
Use ≥2 cm overlap onto intact periwound skin as a default starting point | More intact-skin contact area helps reduce edge lift and leakage risk, especially with movement | Wounds International — Role of dressings in pressure ulcer prevention |
Change foam dressing based on strike-through, loosening, saturation, or maceration, not only by schedule | Prevents leakage, skin damage, and loss of protective function | |
Plan secondary fixation for non-bordered foams and avoid aggressive securement on fragile skin | Keeps dressing centered while minimizing skin trauma |
Key takeaway: If securement depends on “more tape,” you’re often under-sized.
Bordered vs non-bordered: pick the fixation approach first
Bordered silicone foam (typical use)
Use bordered foam when you want the dressing to be largely self-fixing (within the limits of anatomy and skin condition). Bordered foam is commonly chosen for secure placement and reduced displacement risk.
For SLK Medical’s high-level comparison of foam dressing types (including the note that non-bordered options require secondary fixation), see SLK Medical’s foam dressing types overview.
Non-bordered silicone foam (when it’s the better choice)
Use non-bordered foam when:
you need maximum flexibility in contouring
you want to minimize adhesive border contact on sensitive skin
you anticipate frequent checks and prefer a simpler “lift and re-secure” workflow
But plan for secondary fixation from the start.
For more detail on selection, see bordered vs non-bordered silicone foam (i.e., bordered vs non-bordered silicone foam dressing selection).
Secondary fixation tips for non-bordered foam (skin-friendly)
Secondary fixation should keep the dressing in place without adding skin trauma.
Common fixation options
Choose based on location, movement, and skin tolerance:
Skin-friendly silicone tape (often easiest for light securement)
Roll gauze / retention bandage (useful for limbs)
Retention wrap (helpful in high-movement areas when clinically appropriate)
⚠️ Warning: Fixation failure is not just a “stays on” issue. Poor securement can increase friction, edge lift, and leakage risk. Size and fixation should be treated as one system.
Technique: secure without tension
Anchor fixation without stretching across the skin.
Avoid creating “pull lines” that concentrate tension at one edge.
If tape is required, use shorter segments rather than one long, tight strip.
Technique: plan for atraumatic removal
Remove tape slowly, low-and-parallel to skin.
Consider barrier products when local protocol supports it.
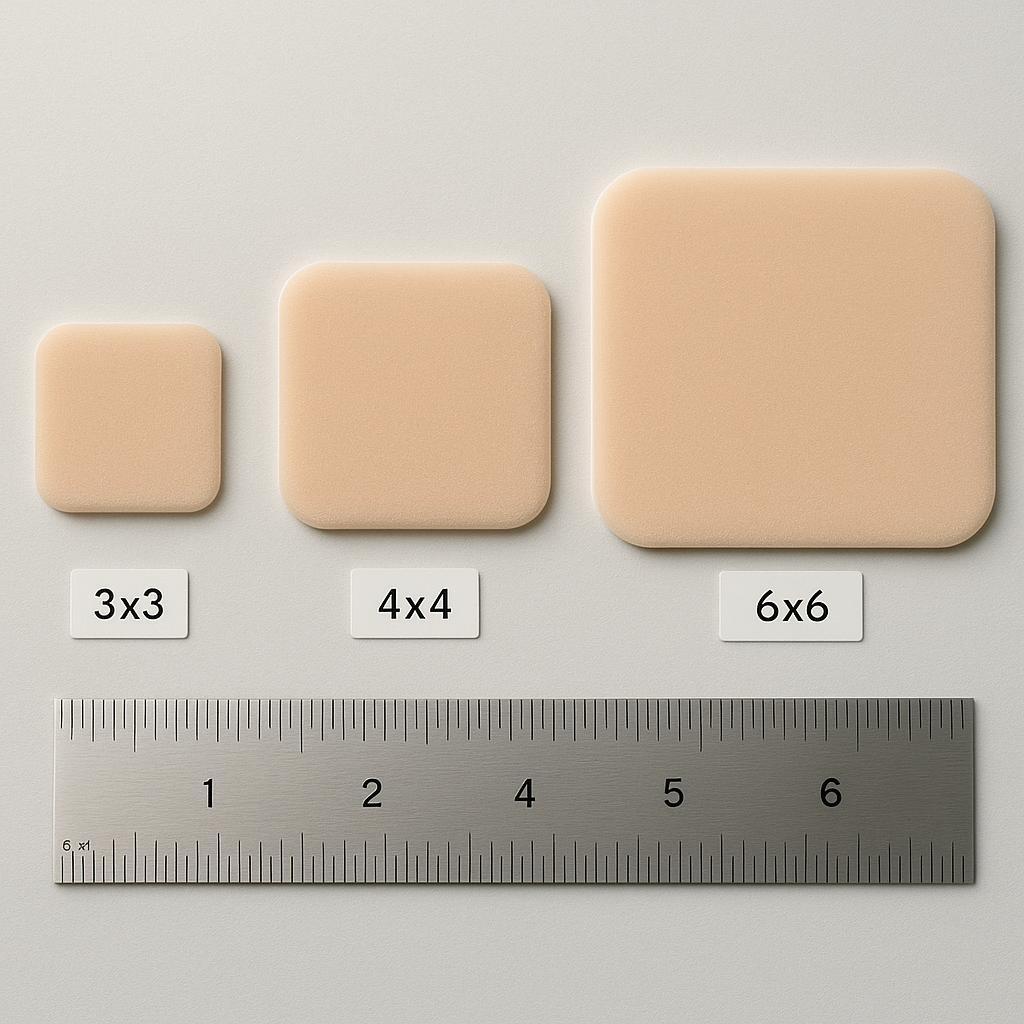
Photo atlas (non-graphic): sizing and placement references
Use these images as quick training aids.
Size comparison
Overlap visualization
When to change a silicone foam dressing (quick triggers)
Foam dressing wear time is often described as up to several days (commonly up to 7 days), but in practice it should be driven by what you see at the bedside—not the calendar. For example, WoundSource notes foam dressings may be worn 1–7 days depending on the wound and exudate, and highlights saturation/strike-through and maceration risk when drainage overwhelms the dressing (WoundSource — What is a Foam Dressing?).
Consider changing the dressing sooner (or reassessing size/securement) if any of the following occur:
Strike-through/leakage (fluid reaching the edge or escaping)
Loosening or repeated edge lift that won’t stay sealed after smoothing
Visible saturation or the dressing becomes wet/soiled
Periwound maceration (whitening/softening) or increased skin irritation
Worsening pain, redness, swelling, odor, or other infection concerns (follow local protocol and clinician judgment)
Common sizing mistakes (and quick fixes)
Mistake 1: treating 4×4 as a default for every site
Fix: start from the site dimensions + overlap, then select size.
Mistake 2: using “more tape” to compensate for an under-sized dressing
Fix: size up first. Then use minimal secondary fixation.
Mistake 3: stretching the border or fixation during application
Fix: place gently, smooth outward, and avoid tension. SLK Medical’s application steps emphasize smoothing and avoiding stretch in their step-by-step foam dressing guide.
Mistake 4: ignoring wear-time signals
Fix: change when the dressing is loose, wet/soiled, or when exudate reaches the edge. For general wear-time framing, see how long you can leave silicone foam dressing on.
Video: silicone foam dressing performance (SLK Medical)
This short video is a product-level overview to help teams visualize silicone foam performance and handling (pair it with the sizing rules above for training).

Next steps (procurement-grade)
If you’re building a distributor training kit or a unit-level standard work instruction, SLK Medical can provide sample fit guides and sizing support to reduce mis-sizing, edge lift complaints, and avoidable dressing changes.
Request:
a sample fit guide (3×3 / 4×4 / 6×6 and additional sizes)
spec sheet + IFU pack
a sampling plan aligned to your top use sites


